Installation and configuration Sitecore Email Experience Manager Part-2
EXM Part 2: Explore EXM emails and
reporting Data.
EXM module divided in to two series.
EXM Part 1: Install&Configure EXM.
EXM Part 2: Explore EXM emails and reporting Data.
EXM Part 1: Install&Configure EXM.
EXM Part 2: Explore EXM emails and reporting Data.
In previous article we had setup EXM and
test MTA. So let’s play with EXM and explore some basic feature like
personalize email, multilingual email, reporting data.
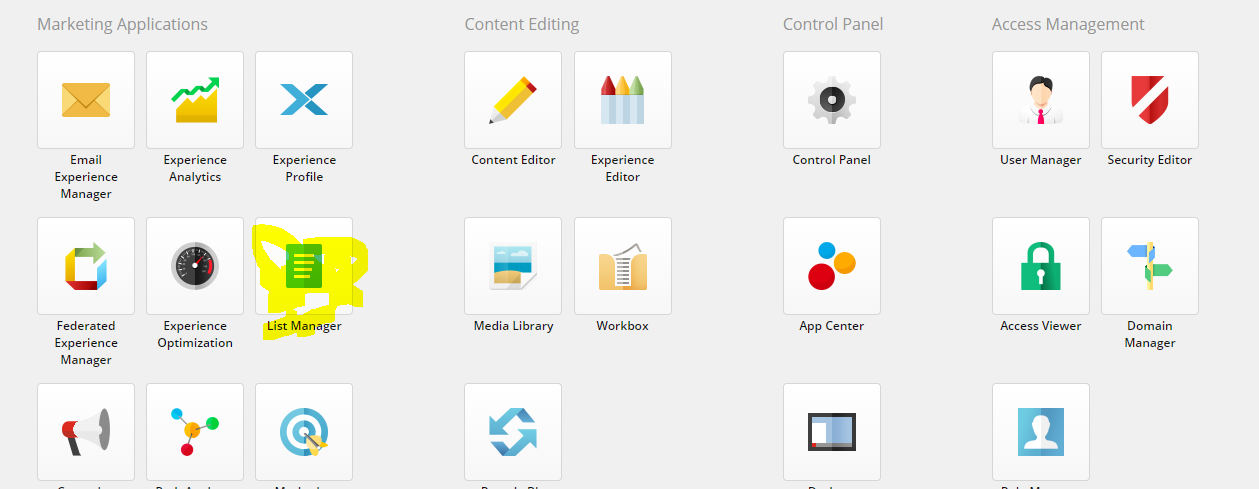
Let’s start with list manager to create contact list.
I have already created list in local and put some
emails. It’s have three fields.
First Name
Last Name
Email Address
three fields mandatory to upload contact list.
If you want to more fields like that preferred
language, phone etc. then you have to add filed in core data base to below path.
/sitecore/client/Applications/List
Manager/Dialogs/ImportWizardDialog/PageSettings/TabControl
Parameters/Map/ImportModel
For now just skip this steps.

Click on launch pad and moving to create contact list. So I have
created one contact list with csv format and going to upload this file. Just click
on list manager it will redirect separate module where you can manage your contact
list.

Now you will see Create button just click on that It will
open menu and choose first one creates list from file. When you click on that
it will open new popup and here you will choose file and just import this file.
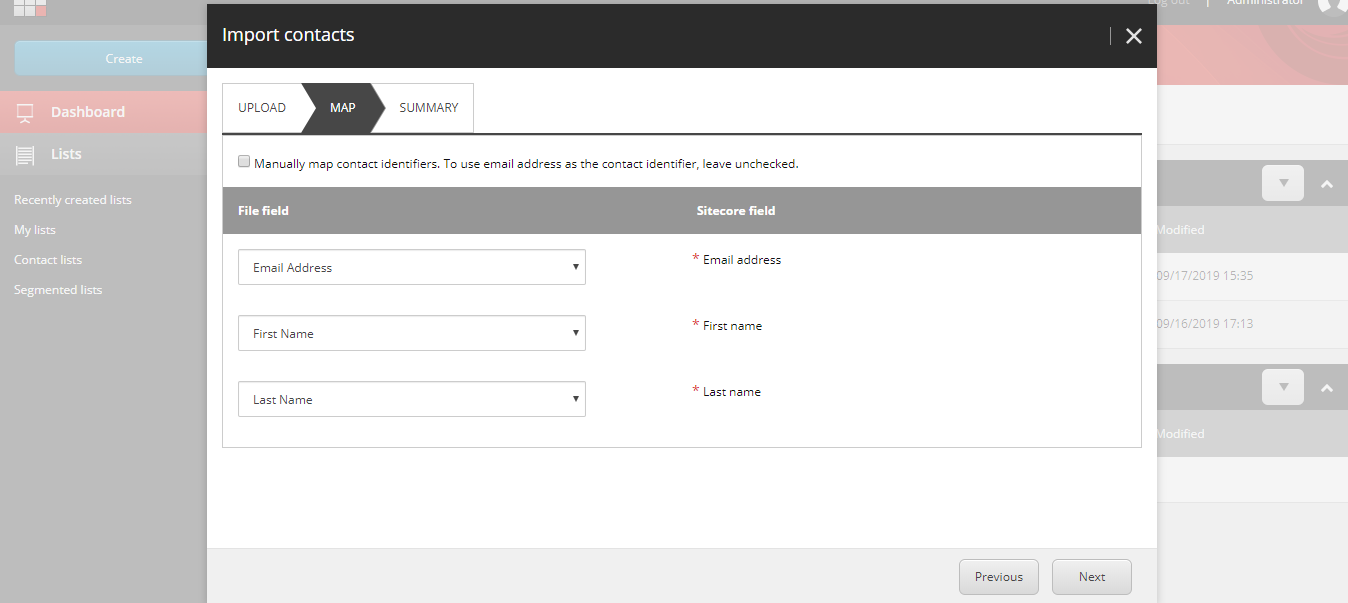
After import successfully just click on MAP to bind column. Choose
column as per respective names and click on next. In summary tabs you will see
how many contacts imported here. Click on finish button and you will your list
under dashboard.
Note: sometimes
locking issue happened so don’t scared just one simple steps we can unlock this
list. In top menu you will see Action button just click on that and choose
unlock list.

That means our contact list ready to use send emails.
Let’s move on to create new campaign and sent it to the
contacts which created earlier. So again coming back to Launchpad and navigate
on Email Experience manager.

Yeah! you will see a separate module here. Where you can
manage your emails and campaign.
Note: First one
you have to set default setting for EXM by clicking on default setting button
which is present on right top. It will open popup.

So click on create button it will open menus and choose
regular email campaign.

It will open popup where you can select template as per your
needed. I have choose here simple html text and give name accordingly.

Note: you can choose here your custom page
When you click on create button it will redirect another
page where you will see some configuration tabs.

In first General tab you will see general information,
sender details. You can edit as per your needed.
Click on second Recipient tab here you will choose contact
list which uploaded earlier. Here are two boxes one for include list and second
exclude list. You have to go under include list and click on drop down it will
show you contact list which is present under list. Choose which you uploaded.

Click on third message tab. Here you will be put subject and
body.
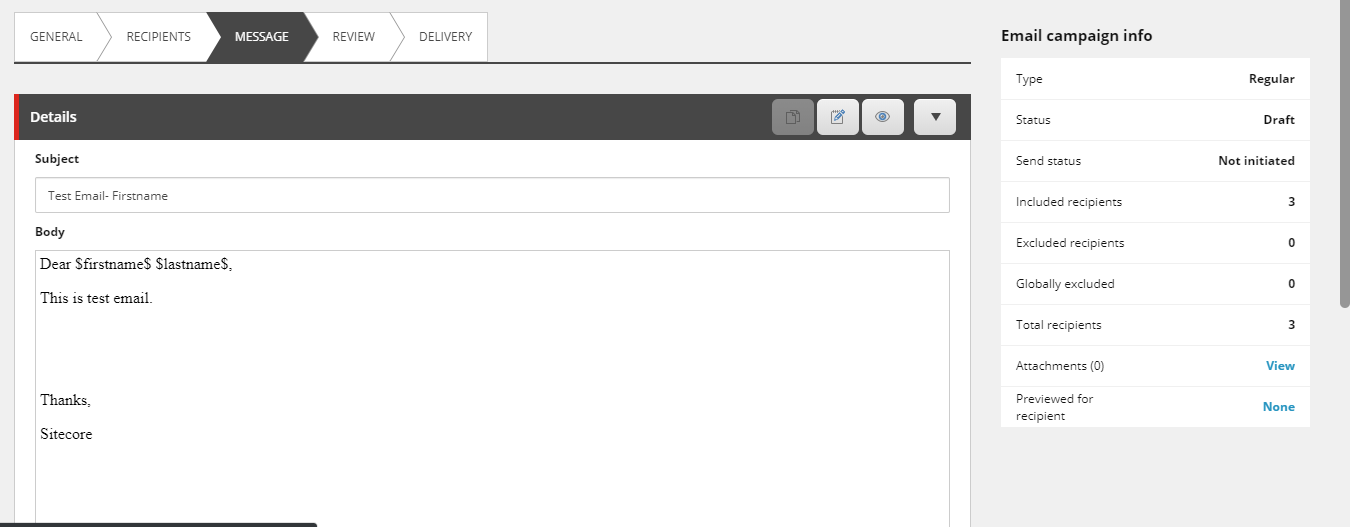
Note: you can see
I am using tokens to get first name and last name. say for example I am sending email to jack so
it should be go like Dear Jack, so in Sitecore we can achieve this through the
tokens.
Multiple tokens we can use like.
$firstname$
$lastname$
$email$
$phone$
So moving on review tab you can send email here to instant check
look & feel content. I just put my email id and clicking on sent button.

In below SS you see email which I wrote and see the first
last name.

So finally moving on Delivery tab.
In this tab have many
option like that delivery notification, multi lingual emails, scheduling
emails. You can explore yourself each n every point.
i am just press button to send message.

For verifying we will move on mailbox now you will see email
and first name last name whatever we have set tokens earlier in subject and
email body.

It’s have 4 tabs. You can explore more about reports data.


Prepare4Test the best and reliable platform where you can get accurate AD0-E706 question dumps which will assist you in passing your Adobe Certified Expert-Magento Commerce Cloud Developer Exam fast.
ReplyDelete